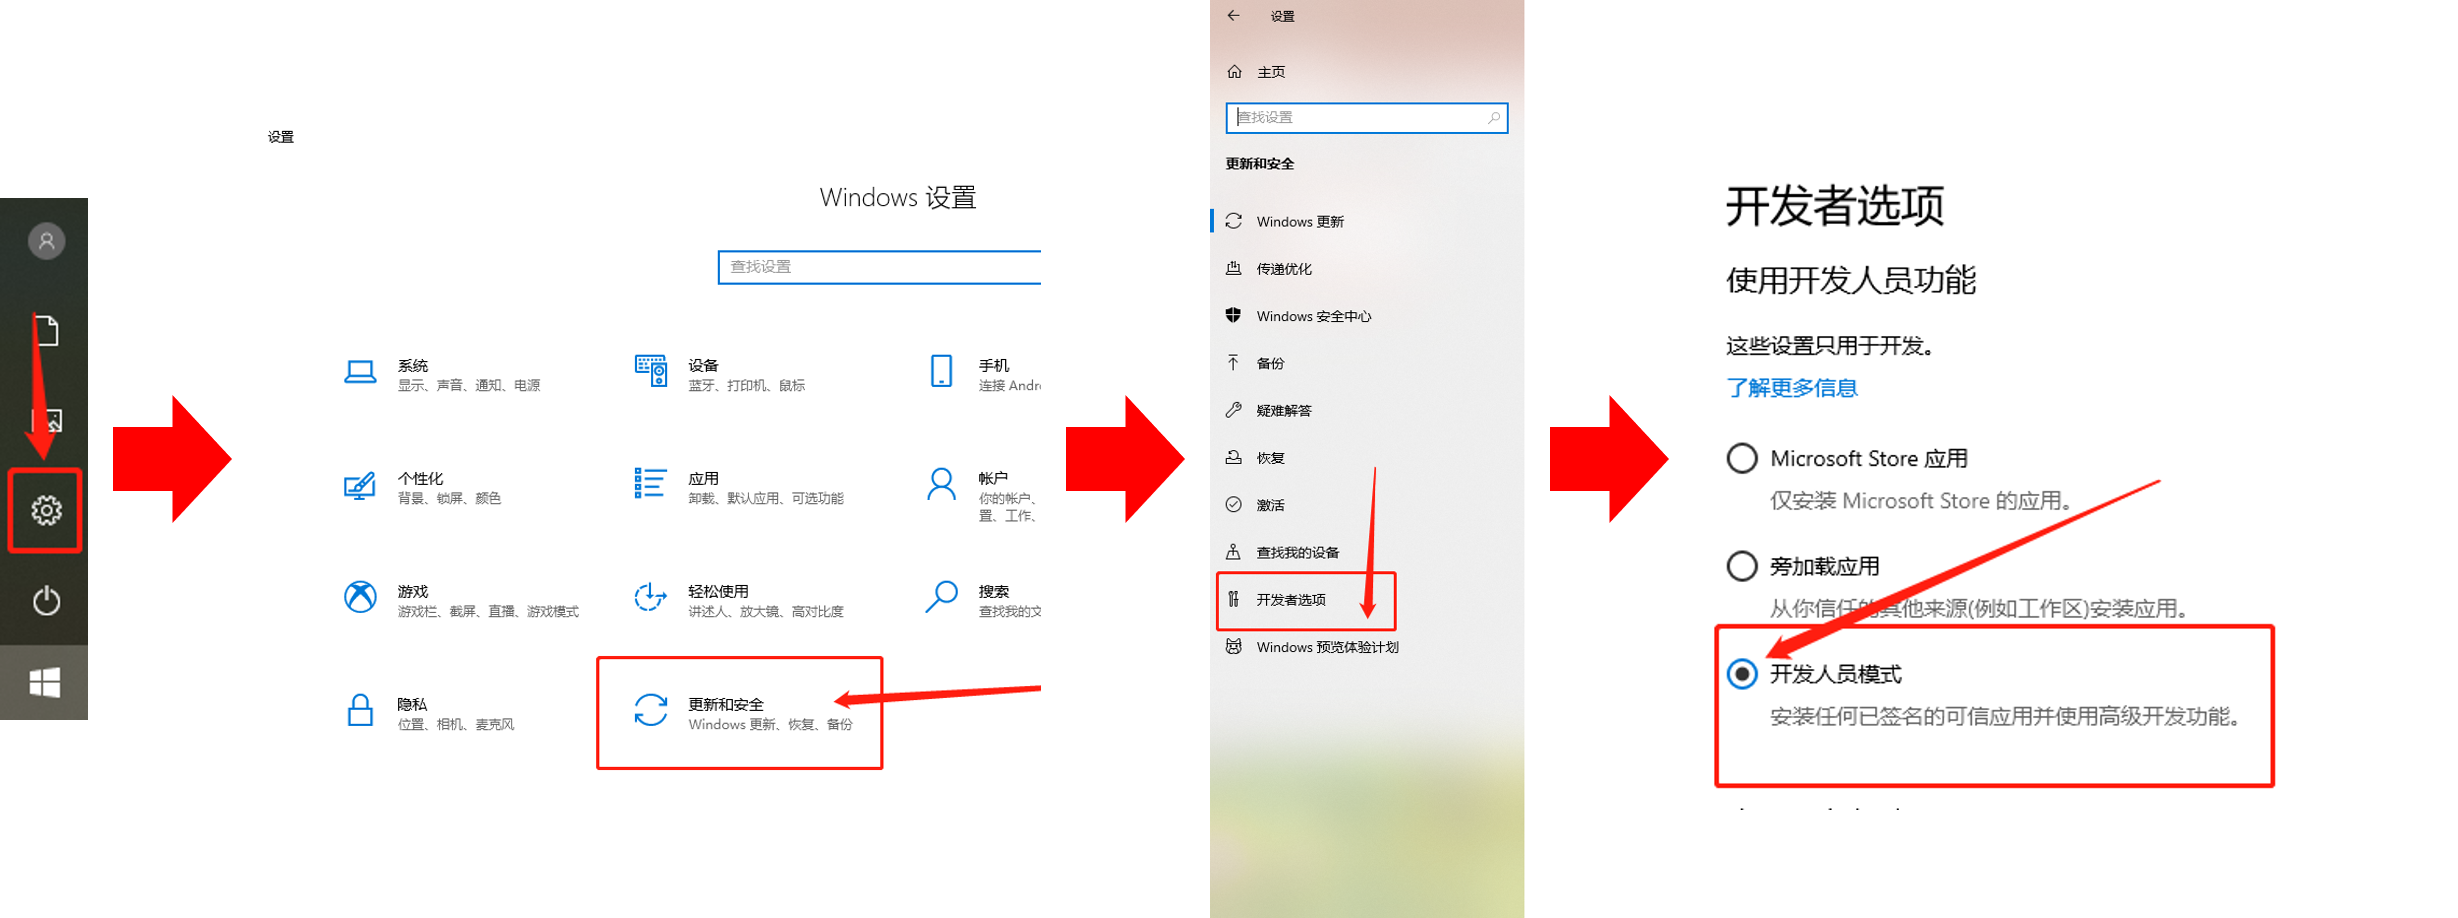
Win子系统多线程Bayes构建 1. win子系统的安装ubuntu (1)启动开发人员模式 Windows系统设置 -> 更新和安全 -> 开发者选项 -> 开发人员模式
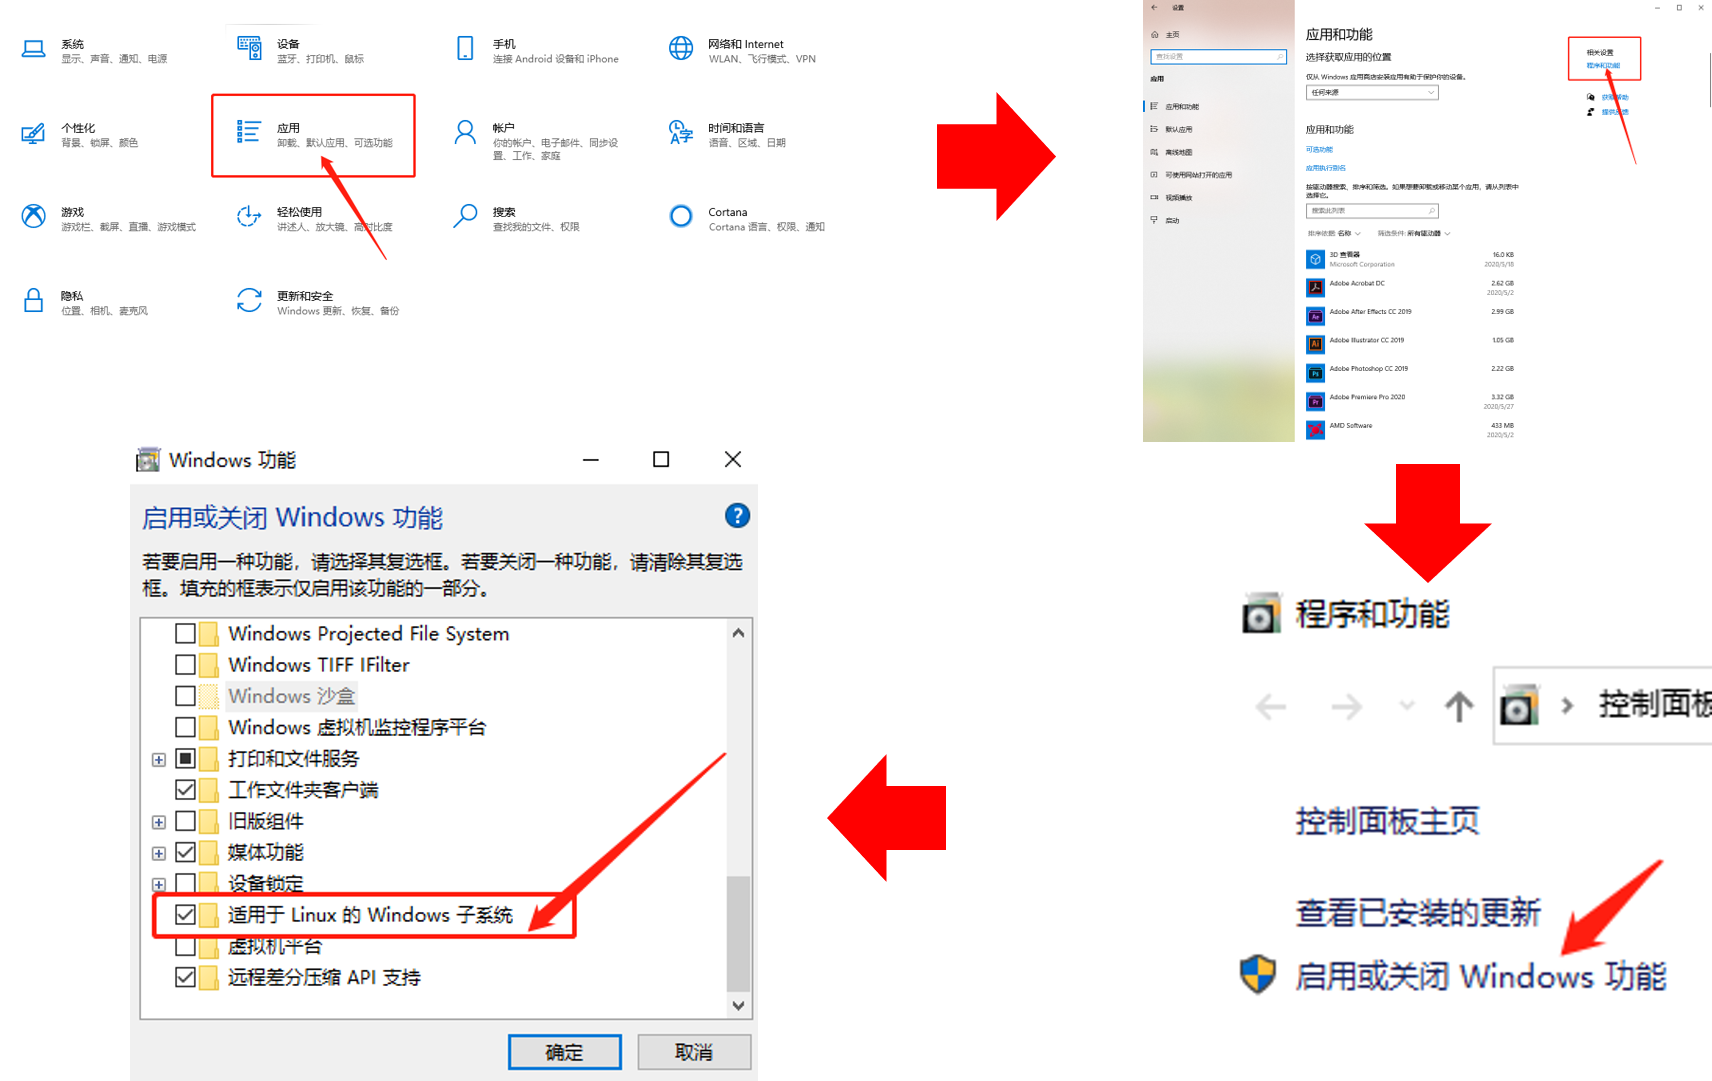
(2)打开window 子系统 linux Windows系统设置 -> 应用 -> 程序和功能 -> 启动或关闭windows功能 -> 适用于Linux的Windows子系统
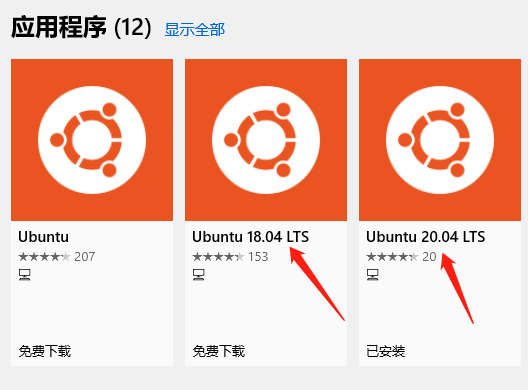
(3)重启电脑! (4)在Microsoft Store中搜索ubuntu并安装 在这里安装ubuntu 18.04和20.04都可以
2. 安装MPI 这里参考了程林老师的多线程MrBayes安装教程及使用(Mpi_MrBayes)如有侵权请与作者联系。
进入ubuntu以后,直接输入以下代码,尽量不要更改。如果不能安装,可以重启一下ubuntu再试一次 1 2 3 4 5 6 7 8 9 10 11 12 13 wget https://www.open-mpi.org/software/ompi/v1.10/downloads/openmpi-1.10.1.tar.gz tar -xzvf ./openmpi-1.10.1.tar.gz cd openmpi-1.10.1./configure --prefix=/usr/local /mpi make -j all make install``` ```bash sudo vi /etc/profile export PATH=/usr/local /mpi/bin:$PATH export LD_LIBRARY_PATH=/usr/local /mpi/lib:$LD_LIBRARY_PATH
3. 安装MrBayes 安装Mrbayes 3.2的方法特别多,我这里介绍的是Github中MrBayes网页上介绍的方法。
首先安装HomeBrew,就是在ubuntu窗口中输入下面的代码 1 /bin/bash -c "$(curl -fsSL https://raw.githubusercontent.com/Homebrew/install/master/install.sh) "
然后把Homebrew加入路径。(照着复制就行) 1 2 3 4 test -d ~/.linuxbrew && eval $(~/.linuxbrew/bin/brew shellenv)test -d /home/linuxbrew/.linuxbrew && eval $(/home/linuxbrew/.linuxbrew/bin/brew shellenv)test -r ~/.bash_profile && echo "eval \$($(brew --prefix) /bin/brew shellenv)" >>~/.bash_profileecho "eval \$($(brew --prefix) /bin/brew shellenv)" >>~/.profile
配置好 brew以后,就可以直接安装MrBayes-mpi了 1 2 brew tap brewsci/bio brew install mrbayes --with-open-mpi
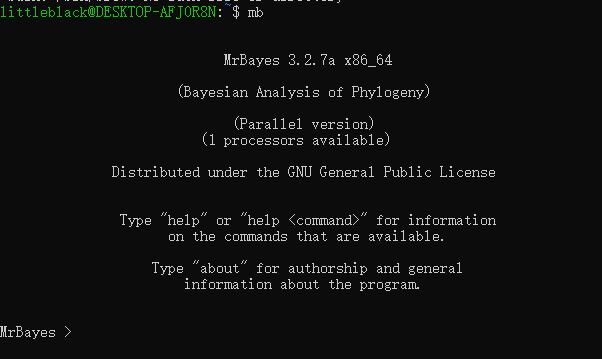
这样MrBayes就算是安装好了。我们可以输入
看看结果
4. 多线程运行贝叶斯 1 2 3 4 5 mpirun -np 4 mb -i /mnt/f/mrbayes/test.nex test.nex就是最终的文件了。


